
Want to fill your raised garden bed, but also not spend so much money on soil? This post will give you so many ideas to get the most out of your raised bed this spring without having to load in so much soil.
We had to fill five raised garden bed areas this year, and on top of that, we had our cut flower farm soil to amend as well! Once we did the math, we quickly realized that we were going to need a lot of soil. Thankfully, there is a little trick that we figured out that cut our soil amount in half!
Layout of your Raised Bed
The first thing you will want to do, is design your garden layout. I talked about this over on this post when I discussed starting your garden from seed. Even if you are using plant starts for your garden, designing your garden area will give you direction. Once you know the dimensions and sizes for the raised beds you will be building, you will be able to calculate soil costs!
How to Calculate Soil Amount for a Raised Bed
All you have to do to calculate the amount of soil you will need for your raised bed is multiply the following: width x length x height of your raised bed to get the cubic feet amount needed to fill the raised bed! You will need slightly less than this if you fill your raised garden bed with twigs and cardboard.
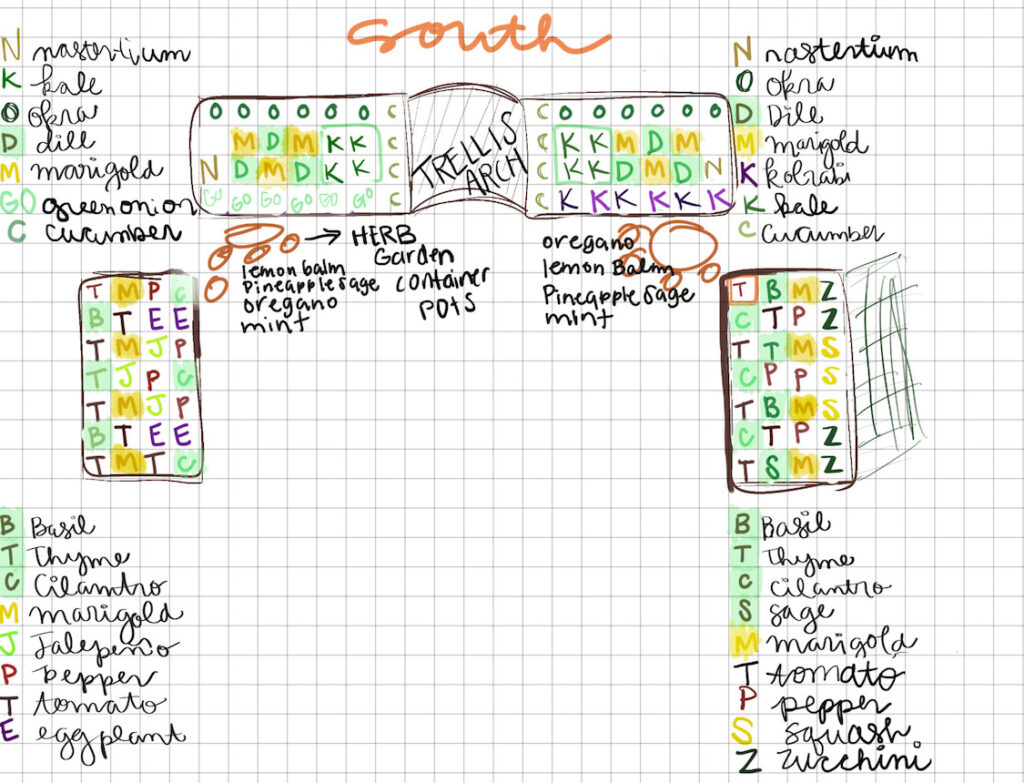
We decided to build our raised beds at an even number, 4 foot by 8 foot. I don’t tie string for the square foot gardening (some people find this helpful!). But, I do draft up my raised beds on my iPad on grid paper. This helps with organization and planning! When it was time to plant, I had everything to scale planned out on a grid and it was so helpful. It was also nice to be able to move some things around before I actually planted plants out. Here is an example of my drafted garden below!
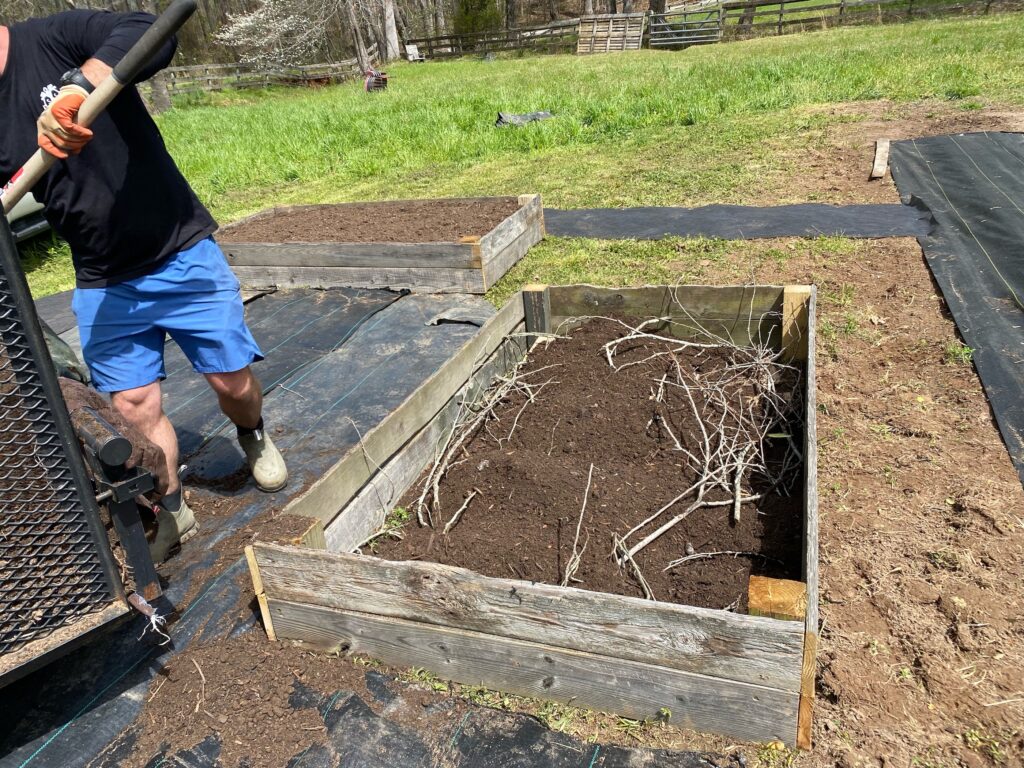
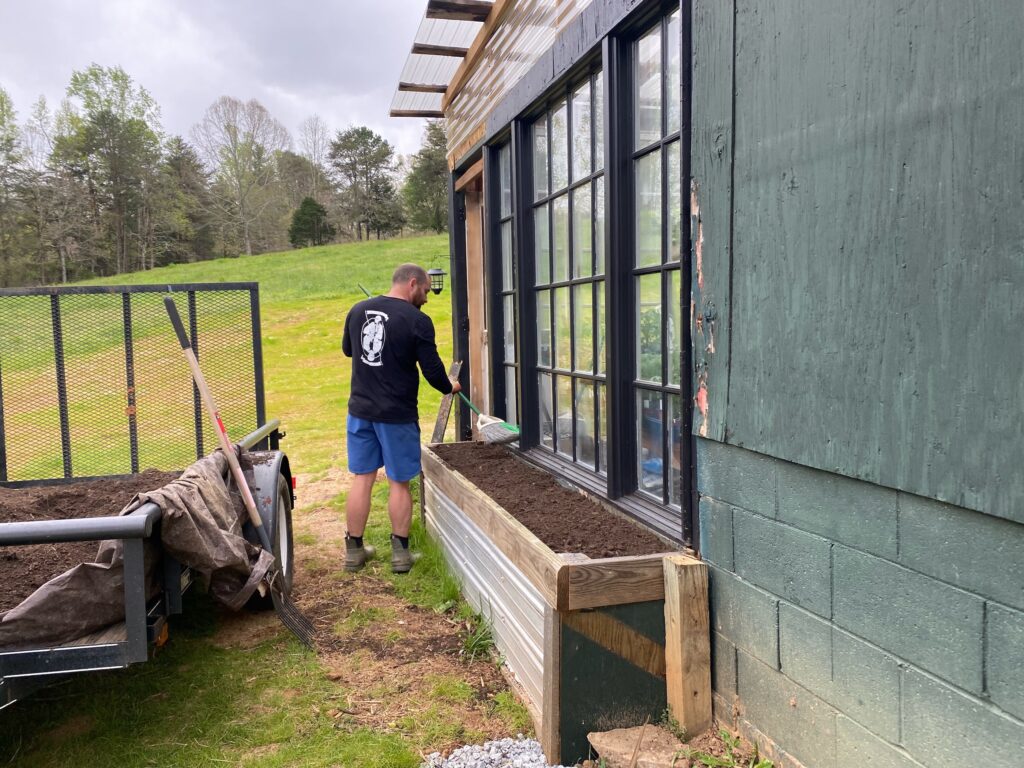
Admittedly- we ended up making three or four trips to the compost place because we didn’t exactly calculate correctly and forgot about a few places that we really needed soil in. One of those places was my deep raised bed under my greenhouse window! I was feeling overwhelmed with figuring out the best way to fill it, because if we had just used soil, it would have been a lot of dirt.
How to Fill Your Garden Bed
We watched a few YouTube videos like this one just to get some direction and came up with a system for our beds! Here is the basic formula:
- Layer the bottom of the raised bed with cardboard. This will significantly help with killing weeds, and it all composts under the dirt which is so cool!

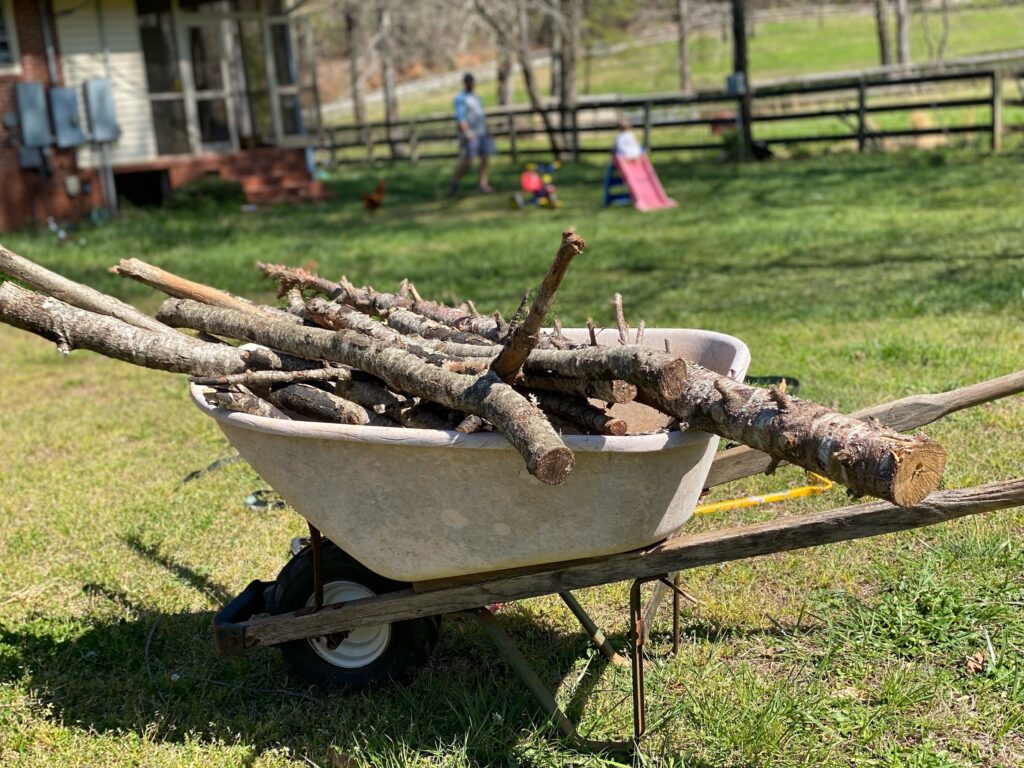
- Next, go find a bunch of twigs. You could also use logs if your raised bed is extremely deep. Layer on top of the cardboard about 3/4 of the raised bed space. This is a fun step to have your kids help you with! My son loved finding twigs around the yard.

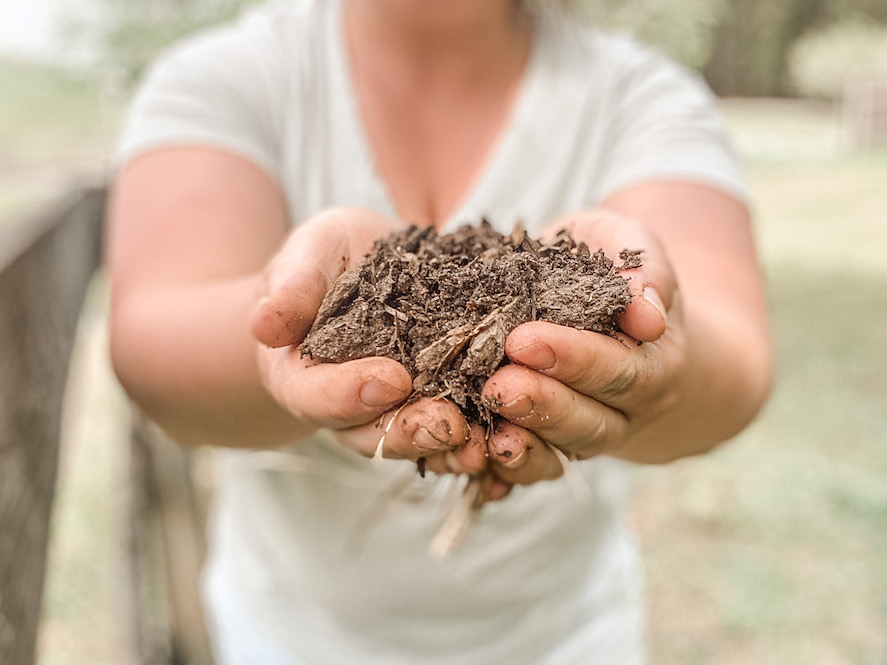
- Then, pour in your soil! We used an organic soil/mushroom compost mix from a place down the road from our house. You can also google or google map “compost near me”, and some local places will pop up!
- This last step is optional, but will improve soil health! You can top your filled garden bed with fresh wood chips. This is a good way to prevent weeds. You can usually google “tree care” places near you, and many times they will have free wood chips if you bring a trailer to fill up!
The twigs and wood significantly helped fill up our garden beds, and it will breakdown over time with the soil. It was just such a fun tip to try and help cut down on costs when you are filling up your garden beds this spring! Here are some process photos of filling our greenhouse raised bed! This raised bed is very deep and took a lot of twigs and logs to fill the space up.


Time to Plant!
Once you fill your garden bed up, take your potted plants and lay them all out to see how the format will look before you officially plant them. It is good to do this, because once everything is set up, you can decide if the format looks good or not. I did this, and realized that my four tomato plants looked a little too close in a 4×8′ box. I was glad that I tried the layout before we actually planted! Once you get your layout done, give the bed a good water and get the soil nice and soaked. Then, grab some gloves and a small shovel and it is time to plant!

This method is quick, easy, and cost effective for getting your garden off on the right foot! I hope this post helped you see how easy it is to fill a garden bed, and that you will have success growing your food this coming season!

Now we are ready for some wood chips! All of the black landscape tarp will be filled in with wood chips, and it will be a lovely spot to come eat dinner and hang out mid-summer. I cannot wait to watch everything grow and bloom this coming season! How many raised beds are you putting together this year? I think I will add more each growing season, but we will see! Growing our own food is so rewarding, and I cannot wait for the season of harvesting.

So ready for gardening! I feel so inspired seeing this!!
Your raised beds look great! We filled ours the exact same way but I didn’t know about using wood chips for the top. Thanks for the tip!
Great information! I will definitely be referencing back!! Thank you!!!
Love it! It’s nice to see a draft outline too 🙂
This is exactly how I’m going to fill mine. I forget the term, but it’s so beneficial for breaking down over time as well as saving on soil costs! Great tips!
This is really useful! Thanks. We grow in containers and I’m going to try some of these methods as completely filling the tubs up with compost is so expensive. Thanks for sharing.