

With Easter coming up at the end of the week, I have been excited to dye our farm fresh eggs with the kids! I wanted to use an all natural, kid-friendly dye that we could consume. I decided to hard boil our farm fresh eggs, and use those eggs to dye so that the kids could enjoy a colorful snack during the week. Come see how easy it is to make these vegetable dyed Easter eggs!
This was a super fun activity to do with the kids. My neighbor Rachel and I had a play date on the calendar, and I decided to bring up the supplies to do these, because it sounded like a fun afternoon activity. The kids loved it so much!
Hard Boiling your Eggs
Here is a quick and easy way to hard boil your eggs before you start this activity!
- Place all 6-7 eggs in a pot with cold water on top. Cover until there is 1-2 inches of water over the eggs.
- Put the pot on the stovetop and turn heat to “high” and start to boil. At this point I also added a tbsp of vinegar and salt to the pot to help with peeling the eggs later.
- Let the eggs come to a rolling boil. Once the water is boiling heavily, turn the heat completely off, but leave the pot in place. Cover the pot and set a timer for 10-12 minutes.
- After 10-12 minutes, take the eggs and strain them. Immediately place them into a bowl with water and ice to cool them off and stop the cooking process. Let them sit for about 10-15 minutes and they will be perfect and ready for dying!
How to Vegetable Dye the Easter Eggs
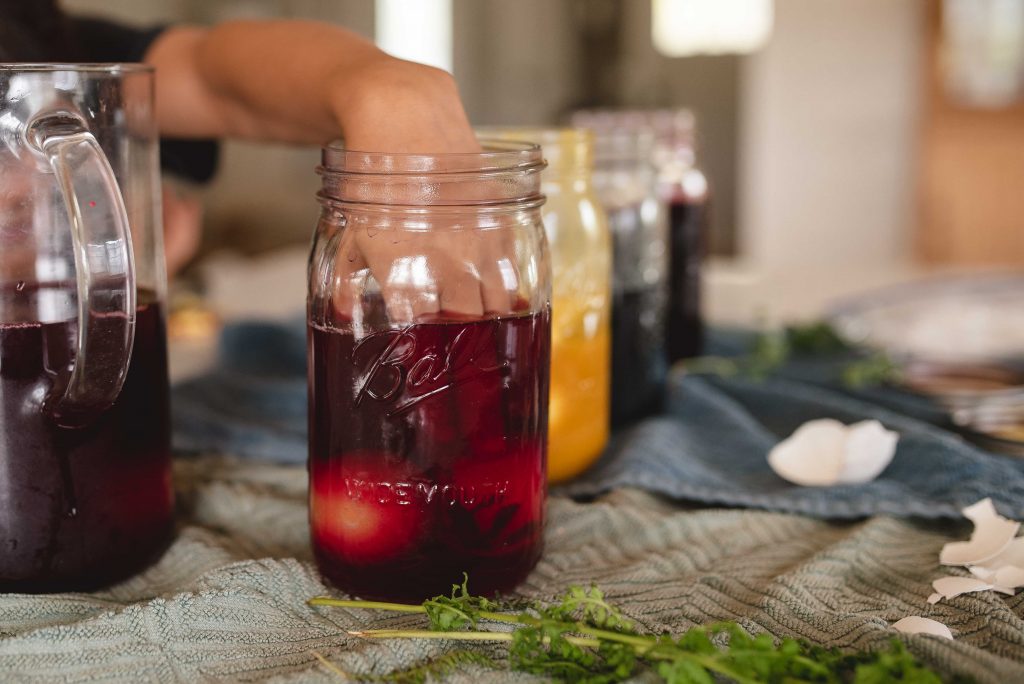
Go check out my non-toxic playdough recipe for the vegetable dye details! I used the same dye for that as I did for these eggs. The only difference, is you add one tbsp of Vinegar for every one cup of dye for the vegetable dyed Easter eggs.
Here are a few of my favorite combinations!
- Cabbage
- Blueberries
- Elderberry
- Turmeric (leave the eggs in this one for closer to 24 hours!)
- Cabbage dye + baking soda (don’t add vinegar to this combination-speaking from experience! You will get a volcano demonstration, and your kids will be laughing!)
- Hibiscus Tea (or any kind of tea for variety! black tea for a brown color, matcha tea for green, etc)

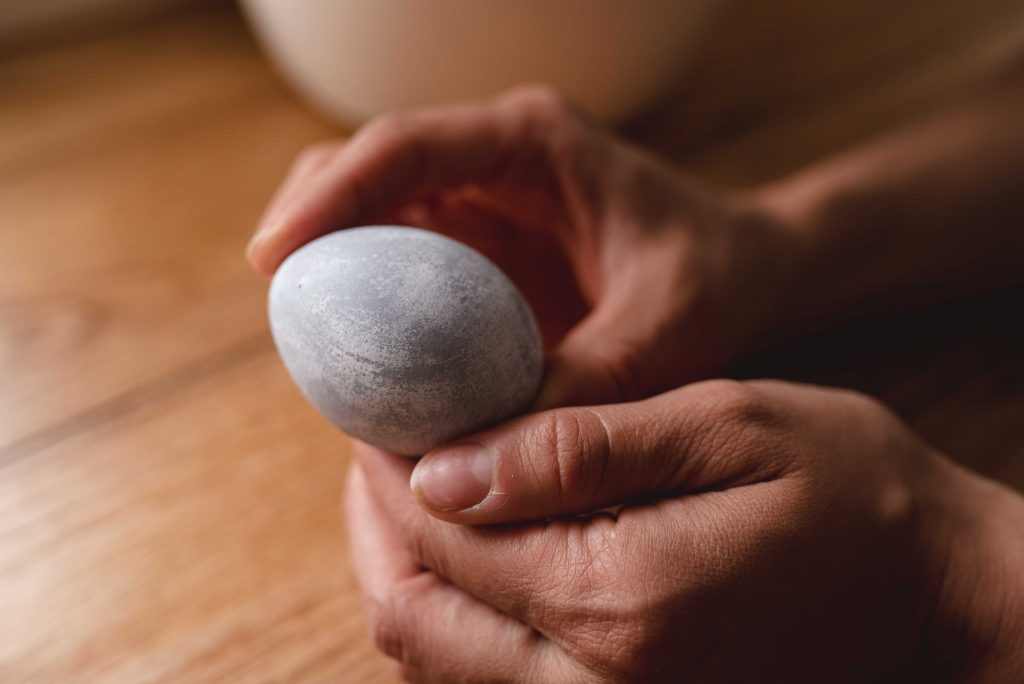
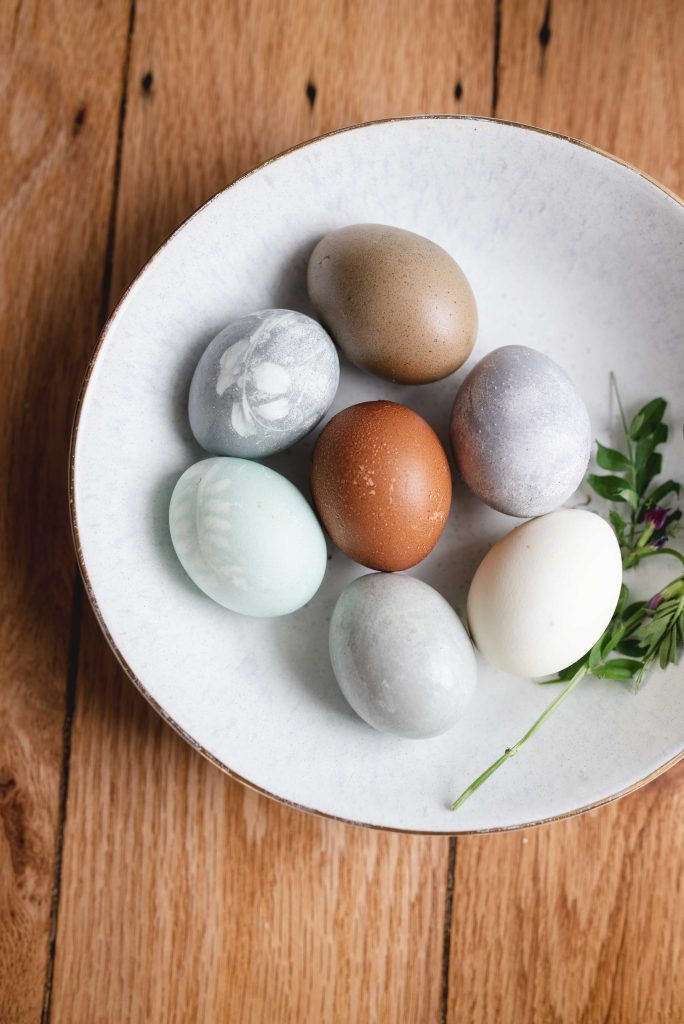
All you need to do, is drop the eggs in for about 45 minutes (or longer for a darker dye!). All of ours were taken out at around 45 minutes. There were a few colors that definitely could have stayed in longer. Next time, I would just take the turmeric dye, place it in the fridge, and take it out the next morning. It needed some extra time for sure. My favorite was the red cabbage + baking soda combo, it created the prettiest blue tones! I would have loved to have seen what a longer soak would have achieved. Patience is tough for little ones! Our kids were so excited to pull them out. H pulled his out, and ended up soaking it in a different color for another 10 minutes, and that gave it a different tone. There are so so many ways you can do this activity!
Add in some Nature
Another fun method for this vegetable dyed Easter egg activity is to get a pack of stockings/hose/tights! Cut the legs of the stockings into strips big enough to tie and fit an egg (I divided my leg on mine by around 5).

Tie the bottom, put the egg in. Go outside and find some ferns or clover, or any other natural item to press onto the egg. Gently press the nature item onto the egg inside the stocking, and stretch the stocking to tighten around the foliage/egg. Make a knot at the top of the egg. Place the whole combination in the dye, and the dye will color the egg, leaving a pretty leaf design on the egg.

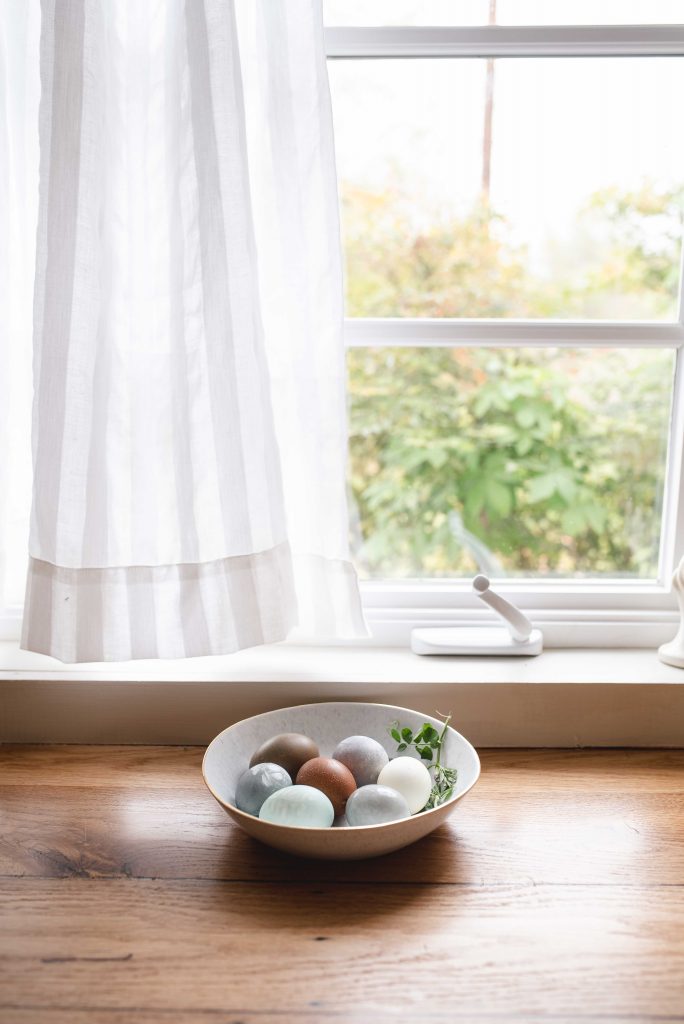
Let the eggs dry, the colors will start to settle in and become so pretty! After the eggs dry, put them in the fridge for a beautiful snack! This was such a fun way to celebrate Easter, and was such a good activity to have your little ones help you with! What color combinations will you try? There are so many beautiful tones that come from vegetables and herbs!
I just love this! I can’t wait to try this with my kiddos!
I’m so glad you love this, you will have the best time! My kids loved it.