
Are you looking for a way to get your kids outside? This sun catcher nature craft is so easy to do with your little ones this spring! Just grab a basket, and let your kids go on a scavenger hunt for little flowers and leaves.


This post contains affiliate links, which means I make a small commission at no extra cost to you
Here’s a list of what you will need to make these easy sun catchers:
- Basket (I just used a thrifted one!)
- Flowers/nature items that could be pressed (we picked violets, buttercup, and clover)
- Laminator– this is the one I have!
- Laminator sheet
- Cardboard
- Hole Puncher
- Twine
- Tape
- Scissors
After you have all the supplies- it’s time to get outside and hunt for nature craft treasures!
Getting outside is so wonderful for everyone. I feel like my kids just turn into different little people when they walk outside. Barefoot, sunny days are the best. They feel like they can roam around and explore all of the beautiful aspects of creation. I love seeing all of the treasures found by my kids. My son is very into finding special rocks and twigs, and is particularly motivated to find a good walking stick if we are headed out on a longer nature walk. I just love seeing the world through their little eyes, it is so magical! When you give your kids a task, most of the time, they whole-heartedly take it on! Finding little flowers and fun items for the sun catchers turns into a fun game.

Gathering the Nature Craft Items
The first step for this activity is to go on a nature walk! We live on a farm (go check out our story here!), so getting out on nature walks is a weekly occurrence for us. There is something incredible about getting out into nature. Maybe that’s your backyard, or, maybe you have a fun park nearby. Wherever you choose, go see how many treasures you can find! Once you come back in from your adventure, it will be time to sort through your finds. I found that violets and buttercups worked particularly well for this if you don’t have time to dry the flowers and foliage. Clover was also a good green accent that lasted well without drying. I didn’t dry the flowers for this activity, but if you want to have more variety and options- do it! I think I will try a dried version of this activity this coming summer.
Next, gently press the flowers between two fingers, or set it on the table and press with your thumb. My son helped me do it this way, and it helps flatten the blooms so that they can successfully make it through the laminator! Open a laminating sheet and gently arrange your design. Then, go watch this video on how to laminate if you haven’t done this before! (P.S.- it’s very easy!).


Laminating Your Blooms
Now it’s time to send it through the laminator! gently fold the other half on top to sandwich the flowers. This next part is a little tricky! Gently pick up the sheet without moving the blooms inside. This took me a few tries. Line it up with the seam side facing the laminator. Let the laminator start to pull it through and carefully hold the other side while it starts to move the sheet through. Once you see the sheet moving through the back, carefully hold the sheet from the back with your other hand holding the front secure. Gently pull and guide it through the laminator (not hard! Just a steady firm tug). This was one mistake I made for my first sheet, and it got stuck within the laminator! Guiding it will help it pull through and not create as many air bubbles. Now you are ready to start the suncatcher!

Crafting the Sun Catcher
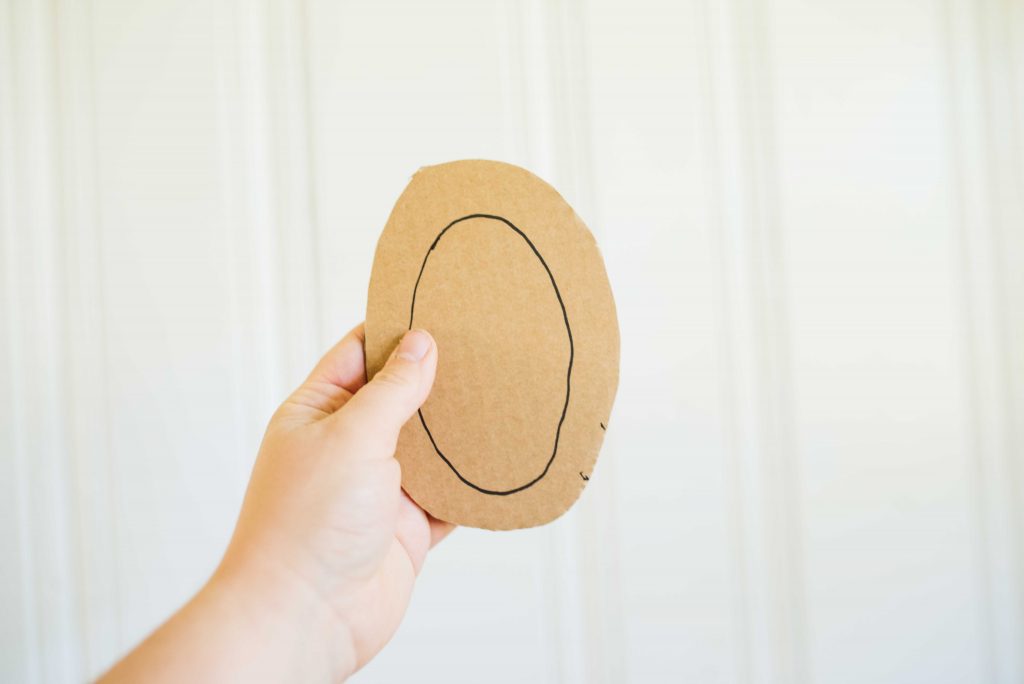
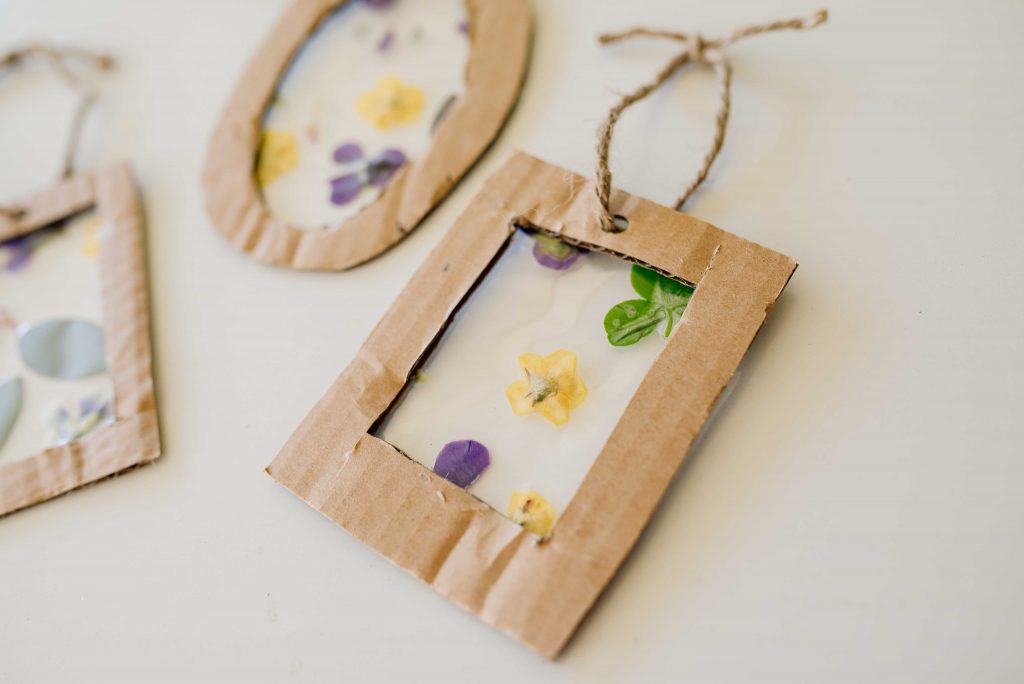
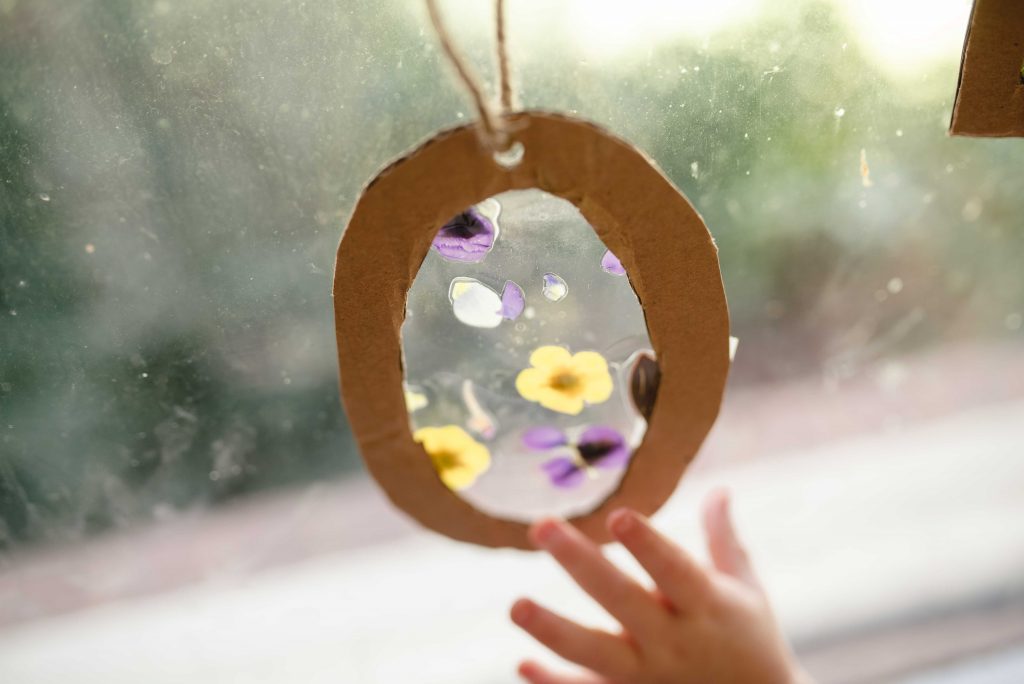
Now it is time to grab your cardboard! I love how eco-friendly this nature craft is! I just used the top of a pizza box to cut and make a frame for these sun catchers. Trace out your shape (get creative!), and cut it out. Then, trace an identical, smaller shape within it, cut it out, and- voila! You have a frame.


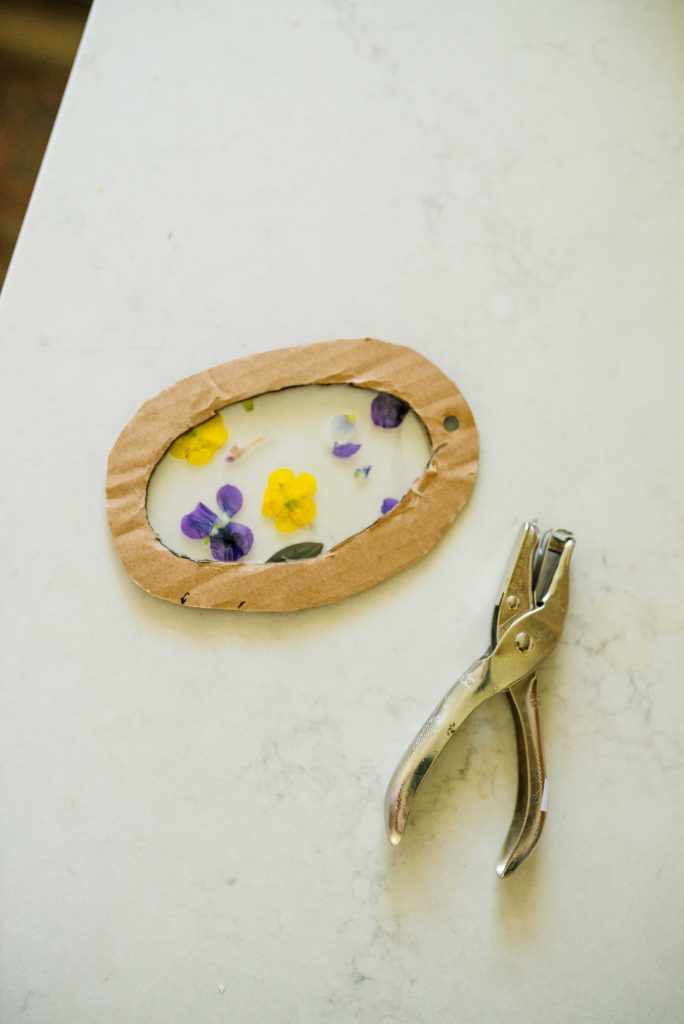
Next, take your sheet of blooms and place it behind the frame to pick a section of the sheet that you would like to use for your sun catcher! Use the frame as a “stencil” and cut around it. You may need to trim the clear sheet afterwards to fit nicely behind the frame. This next part, you could hot glue or tape- your choice! Just attach it to the back of the frame and get your hole punch ready.
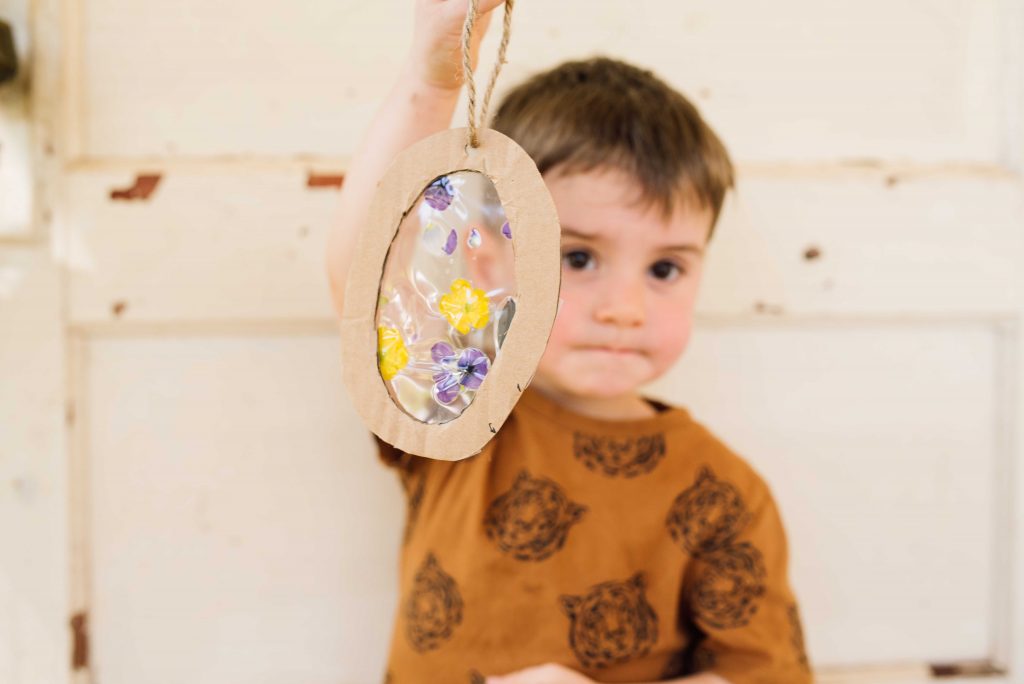
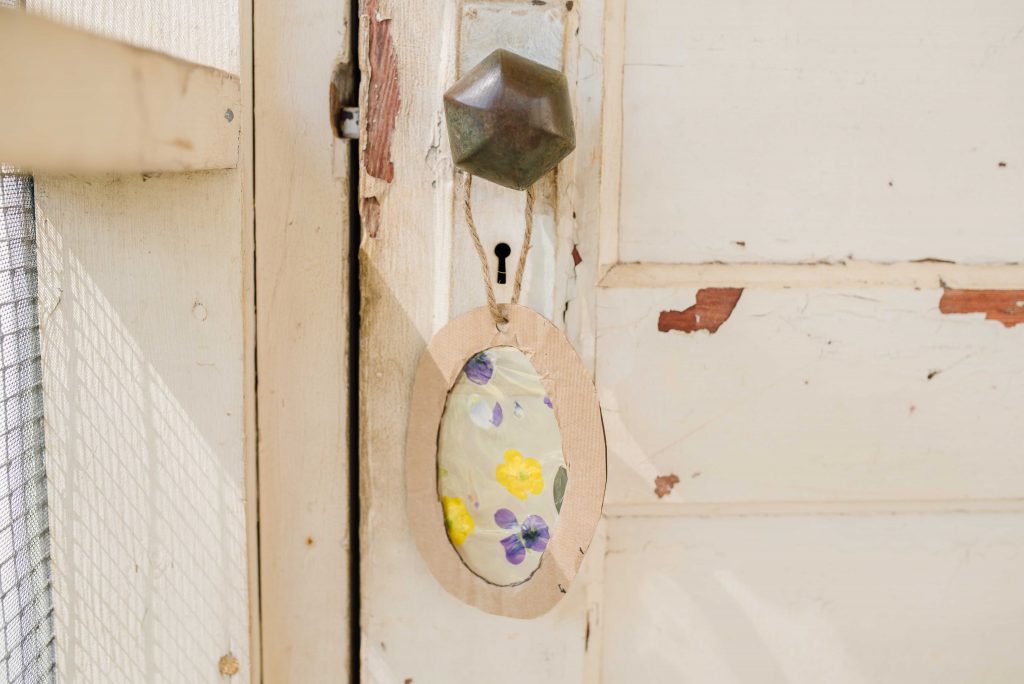
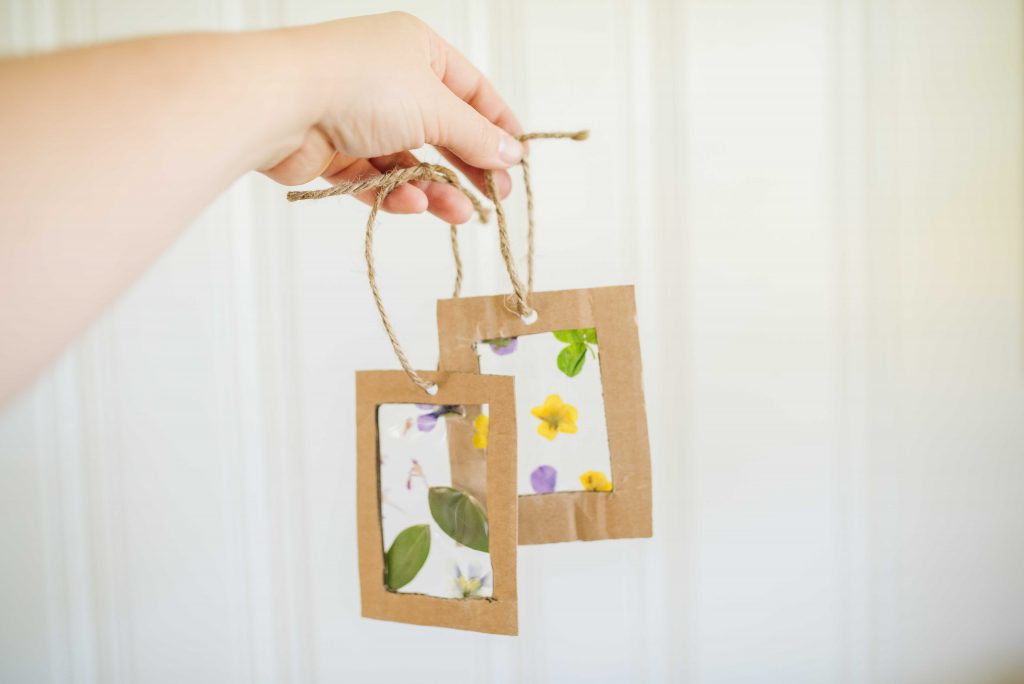
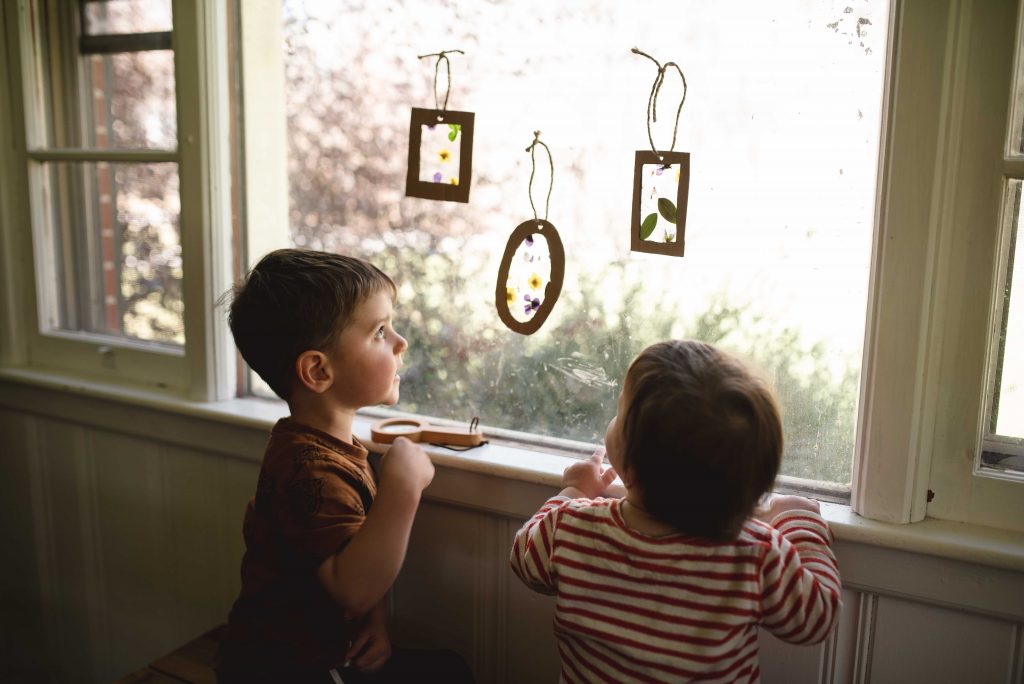
Punch a hole in the top, cut some twine, and make a holder! And, there you have it! Your nature craft is complete. It is such a fun activity, and took us less than 30 minutes to complete together! I love finding activities that the kids and I can do together. My son, Theo, has been admiring his work of art every day since he made these! We put them in our kitchen window so that we could admire them while we have our daily meals. These are such a fun little project to complete with your little ones!


These are absolutely beautiful! I love how you can make different ones throughout the growing season. Exploring nature together is the best.
YES, that is the fun part! I love that you can make them for multiple seasons
Love this! What a fun and pretty kid craft that I actually don’t mind hanging around the house. 🙂
These are so so pretty!
They are so easy and fun to make!!!!
That’s how I felt! They are so pretty hanging in the window.
Super cute idea! I can’t wait to do this with my daughters! Nice post!
Thank you!!!! Can’t wait to hear about how yours turn out.
So cute. My kids love sticking things in the windows, too. And naturally, I have a laminator so now we just need to gather some flowers! Great idea!
You need to do this then!!!! My kids loved helping me find all of the flowers and arranging them. They look SO pretty in the window.